Enable Azure VM Insights by Policy
Azure VM Insights is a new way to get your VMs monitored and collect the performance logs into the Log Analytics Workspace. Earlier, we use to have “Perf” which still works (lets wait for Microsoft to decide to deprecate it) but Perf was a raw data store and had no built-in visuals. Although, both uses Azure Monitoring Agent (AMA) and Data Collection Rules, however, the VM Insights took a step ahead as a full package of monitoring and visuals.
Today, in this blog, I will be sharing the steps of enabling VM Insights at scale for multiple VMs and some personal challenge which I faced and how to fix it.
Pre-Requisites
What you need to enable VM Insights:
- A data collection rule (but not manually, this is where user get confused and i will tell you the way out)
- A Log Analytics workspace
- Virtual machines to be monitored if not already created
Steps to Follow
- Go to Monitor > Virtual Machines and look for the “Not Monitored” resources.
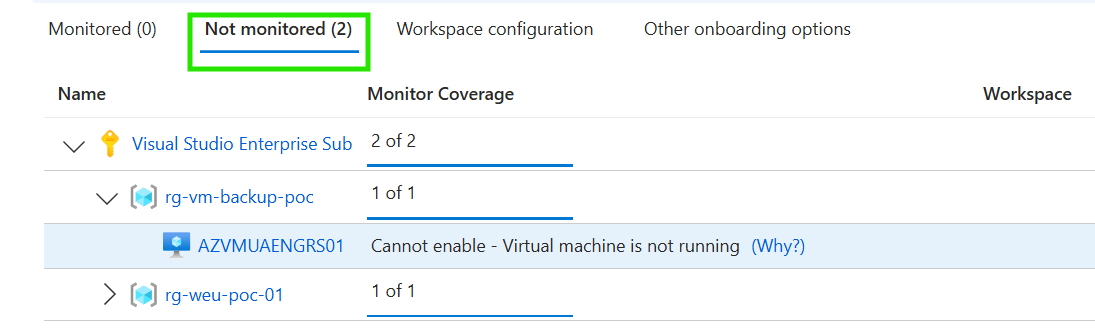
- As you can see, i have two machines under Not Monitored, which means they are not part of VM Insights.
- Beside the name of the VM, click Enable. This will Enable ONLY on that VM and creates a DCR starting with “MSVMI”

Note: If you choose the "Other Onboarding Options" and enable via Policy, it will take a Deprecated policy which will not work. Instead, choose manually "Enable Azure Monitor for VMs with Azure Monitoring Agent(AMA)".4. After the DCR is created in step 3, it is appended with the name of the VM which you enabled for and you cannot use it at scale for all the VMs. To reuse the DCR, follow the next step.
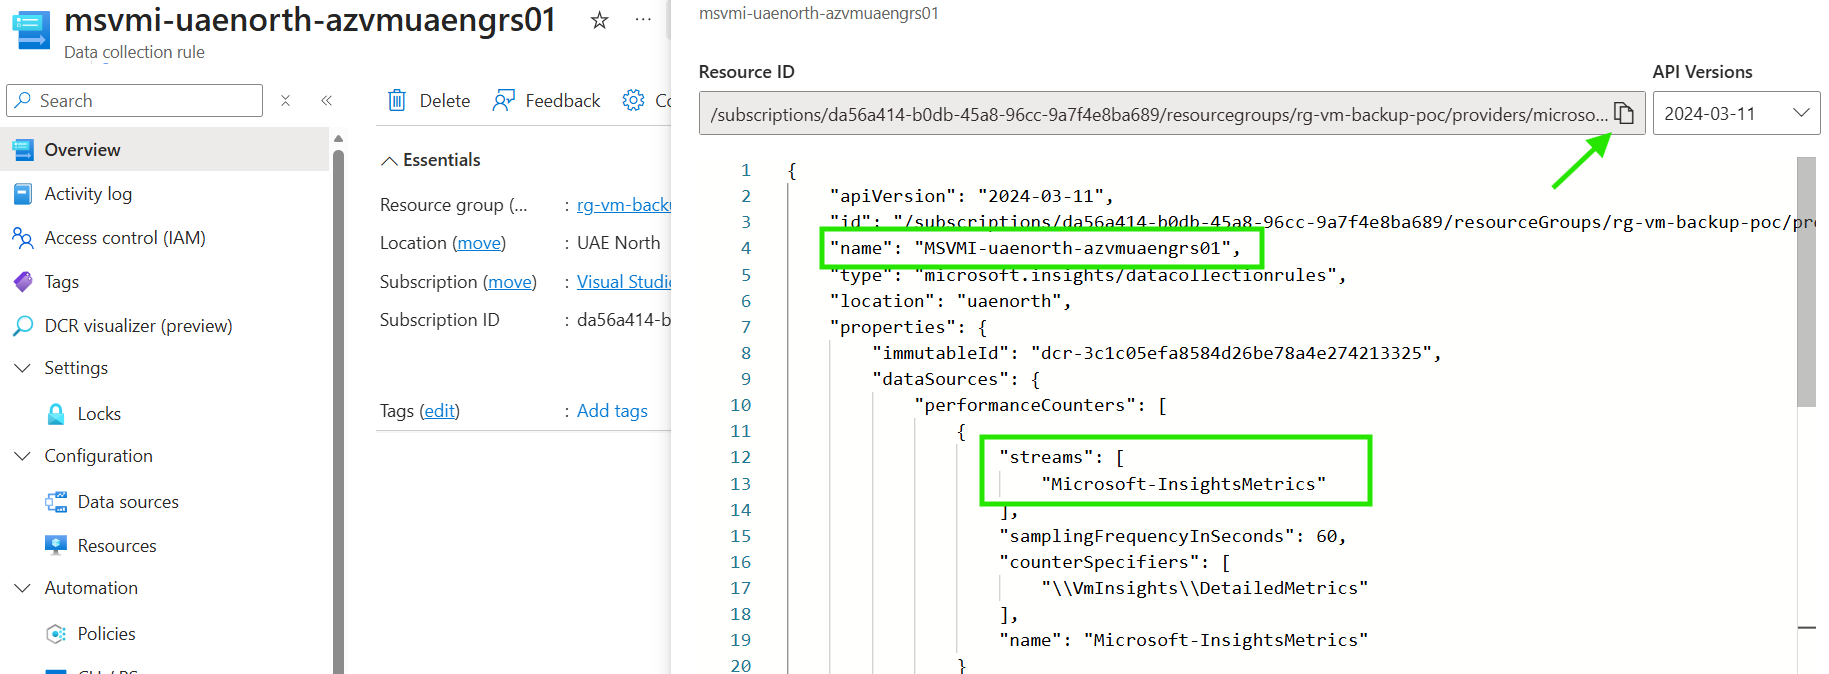
5. Go to Data Collection Rule and search for the MSVMI which got created.
6. Check the JSON view and copy the Resource ID. Notice the parameter “streams” which says “Microsoft-InsightMetrics”. If you create a DCR manually, you will never have this stream which will NOT be taken as VM Insights at all. This is a hard-coded infrastructure thing at Microsoft-end.
7. Go to Azure Policy > Assignments > Assign Initiative. Assign the subscription or resource group level scope and under Initiative Definition, look for “Enable Azure Monitor for VMs with Azure Monitoring Agent(AMA)“
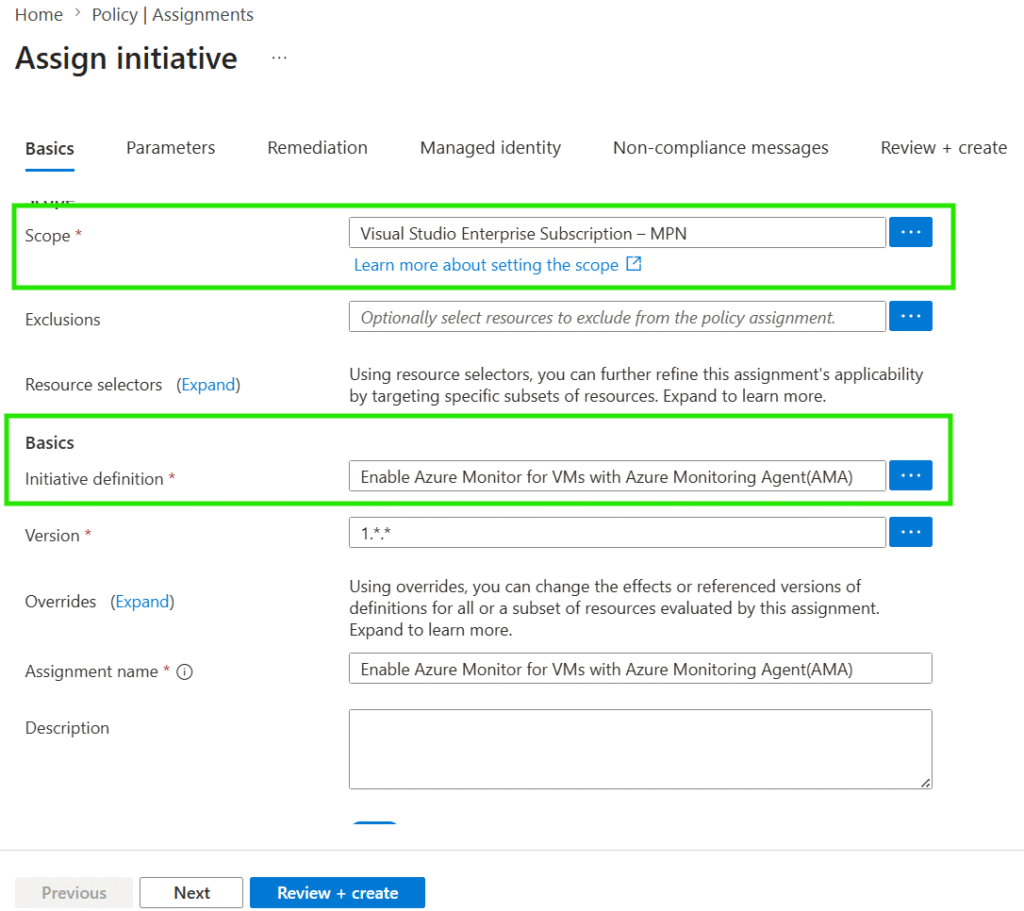
8. In next section Parameters, uncheck “Only show parameters that need input or review”. Paste the DCR Resource ID under “VMI Data Collection Rule Resource ID” parameter. Also, You can choose to BYO User-Assigned Identity as True same as seen in below screenshot.
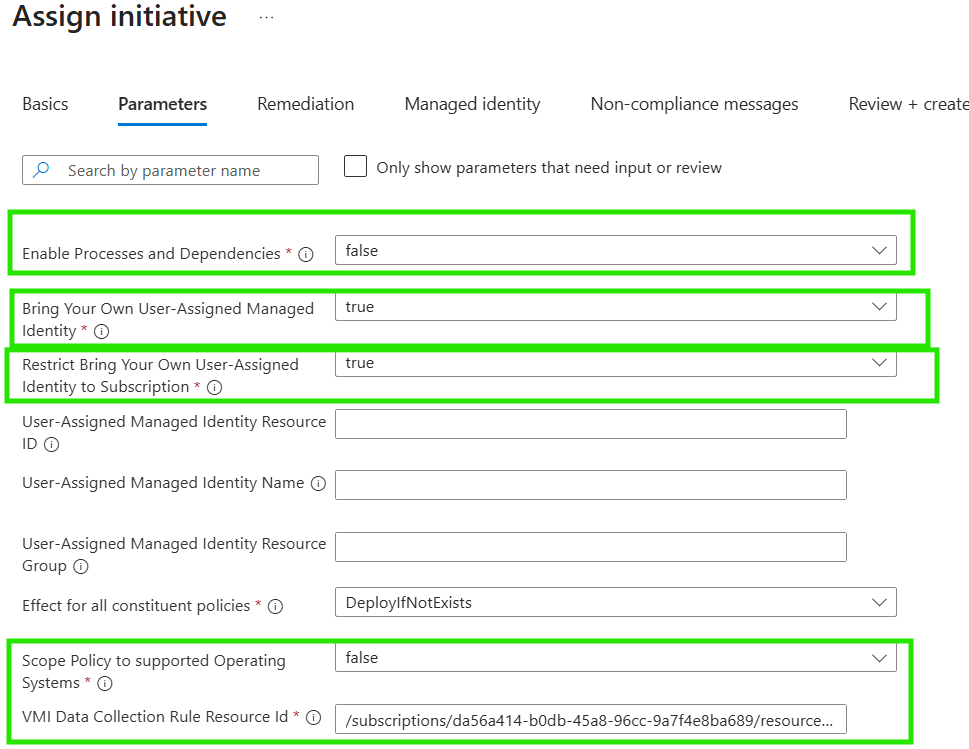
Note: If your virtual machines are not created from Marketplace instead from snapshots/images which are not part of supported OS of the definition, choose "False" under "Scope Policy to supported Operation System". This will then bypass any checksums for supported OS in the definition and creates DCR.9. In the next step, create a Remediation task for the existing VMs in the scope. Choose the option for Windows/Linux (accordingly based on your requirement).

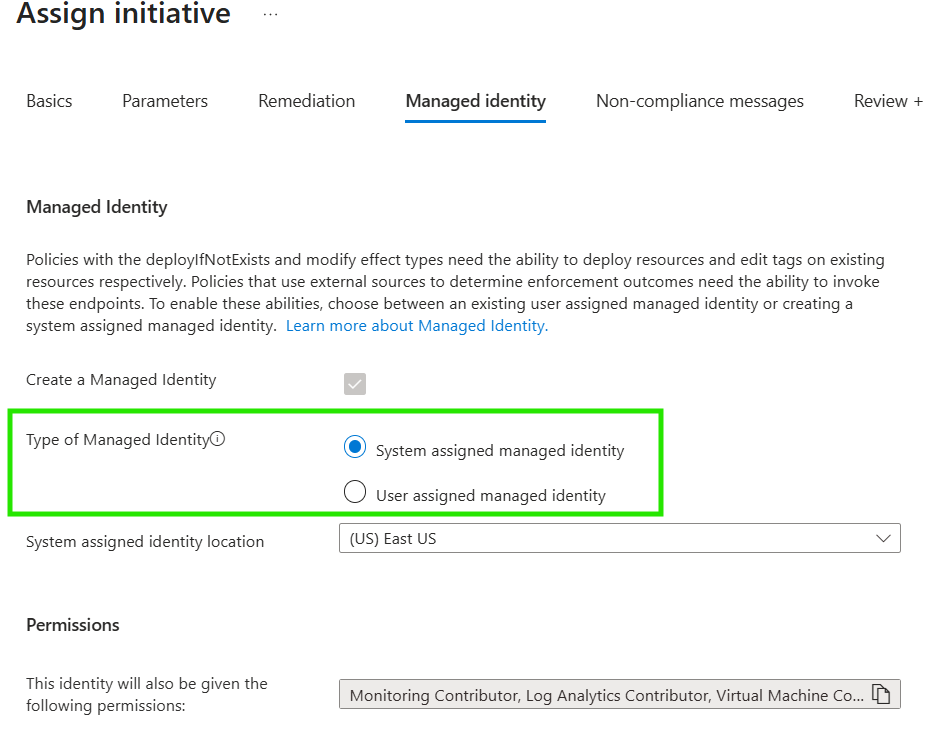
10. In the next section of Managed Identity, keep it as System-assigned MI for the policy to initiate Remediation Tasks and deploy resources if not exists.
11. Keep the next section of “Non-compliance Messages” as default or change as per your requirement. This is totally optional step.
12. Hit Review and Create
After it creates, this will deploy a Remediation Task which you can monitor the progress. This will first Evaluate and then Completes the deployment of the policy.

What if I have multiple subscriptions?
If you have multiple subscriptions and want to reuse the DCR for VM Insights, you must follow the following steps. Microsoft does not let you rename any existing DCR of VM Insights and you can also not create it manually as mentioned in step 6.
- Go to MSVMI DCR which got created in step 3
- Click Export Template under Automation
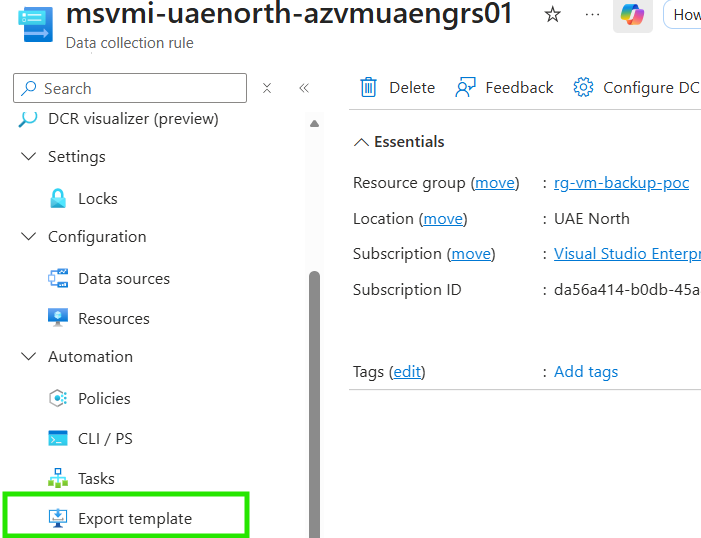
3. Click Deploy and update the subscription and name of the DCR based on your subscription or environment. DO NOT REMOVE “MSVMI-” part, only change the name afterwards.
4. Then follow from step 6 till the end to complete the DCR deployment via Policy.